
So, you want to crochet? But you have no idea where to start or what you need
This is where I would start if I had this advice years ago when I began crocheting 🙂 This is an easy project that will teach you the most basic parts of crochet.
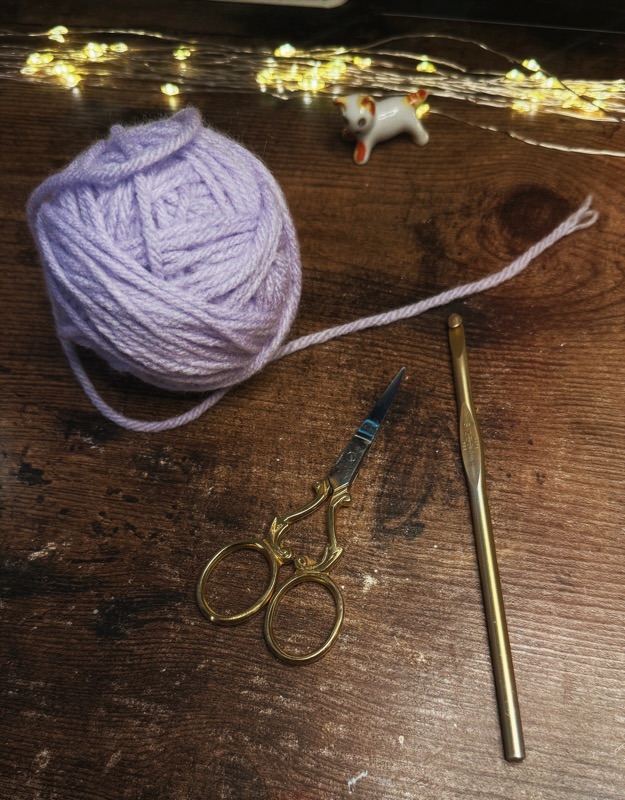
What You Will Need:
- Crochet hook ( I would recommend a medium size hook)
- Yarn (medium weight)
- Scissors
What You Will Learn:
- Slip knot
- Chain (ch)*
- Single crochet (sc)*
*These are US terms and all my tutorials and patterns will use US terms.
Learn Slip Knot
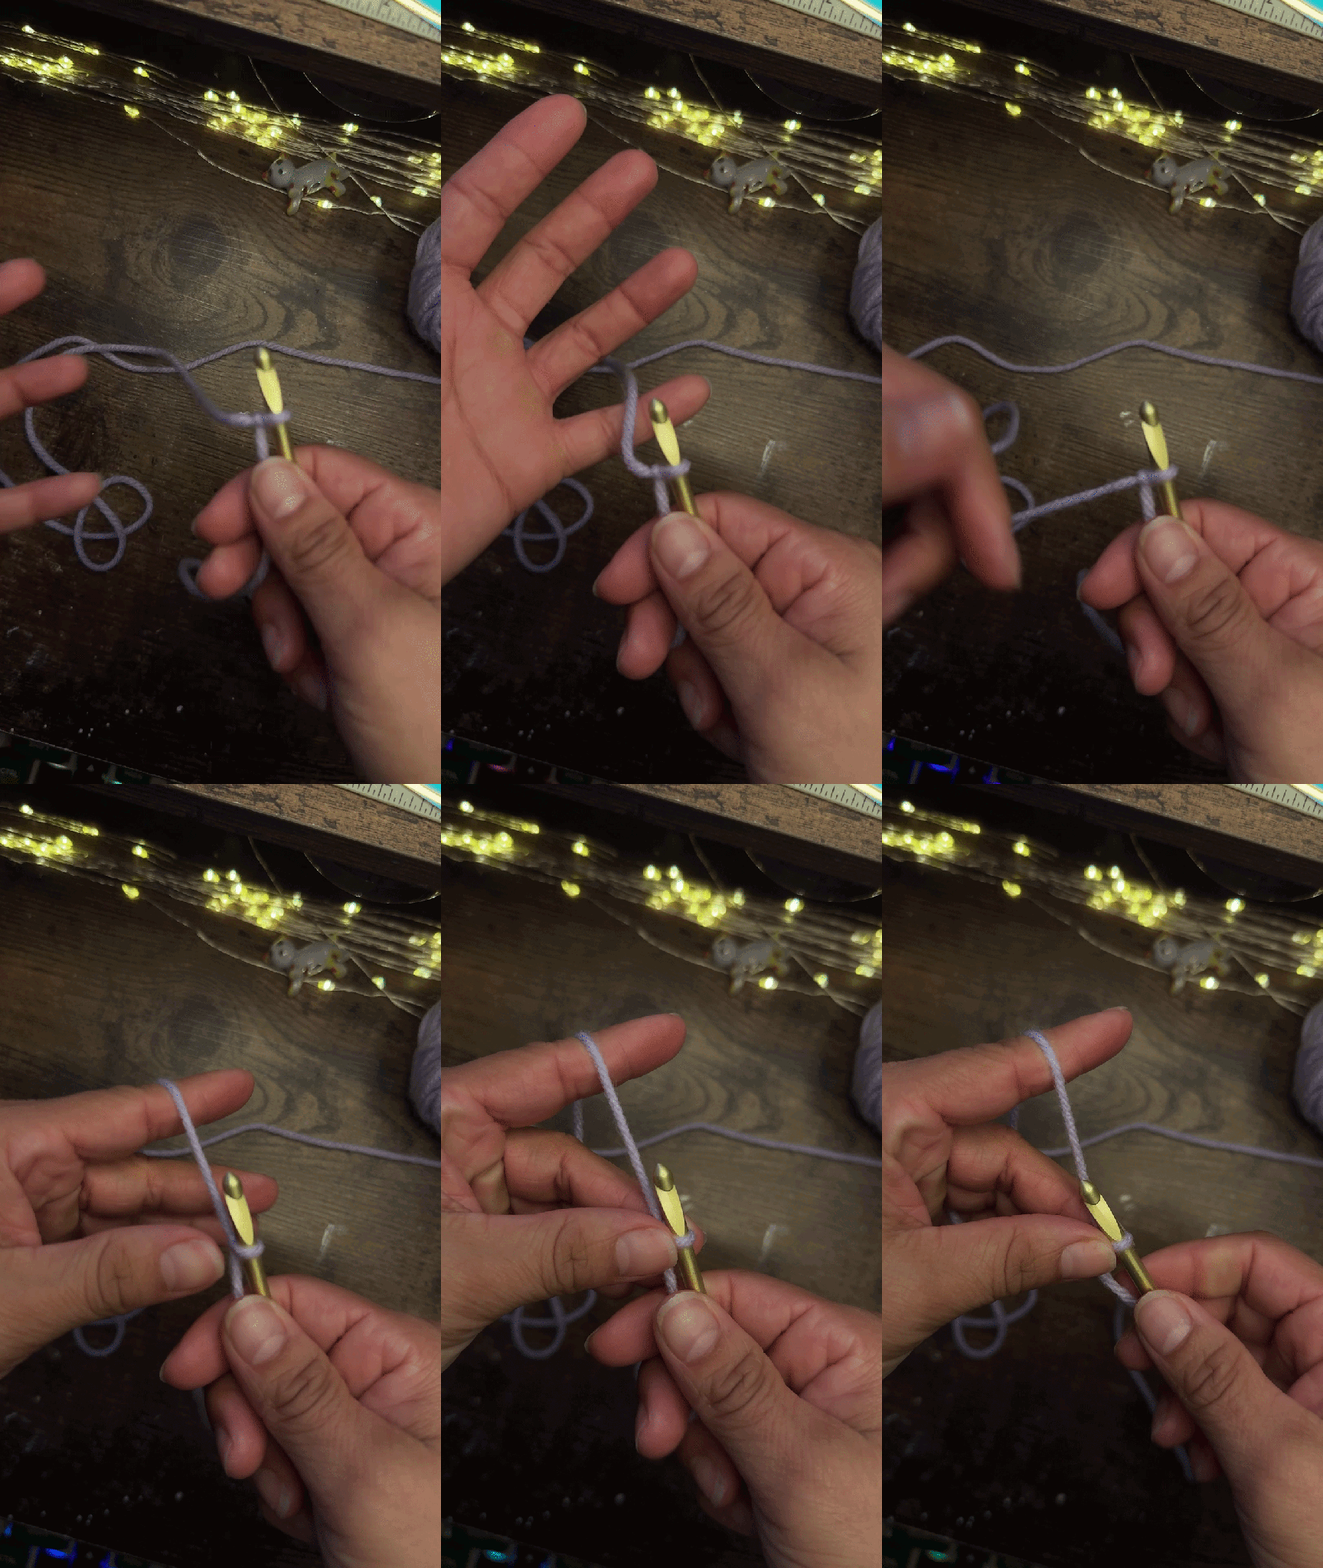
Take your yarn, and with the tail end place over your palm.
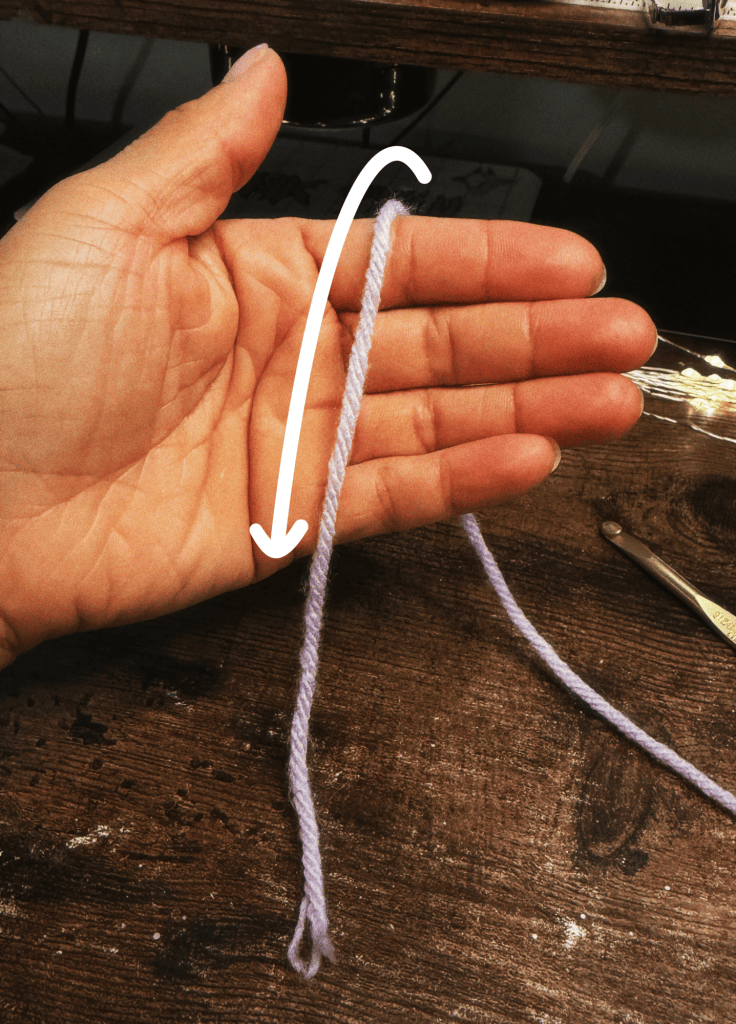
With the tail hanging, cross the yarn over your palm so it creates an ‘ X ’ on your palm.
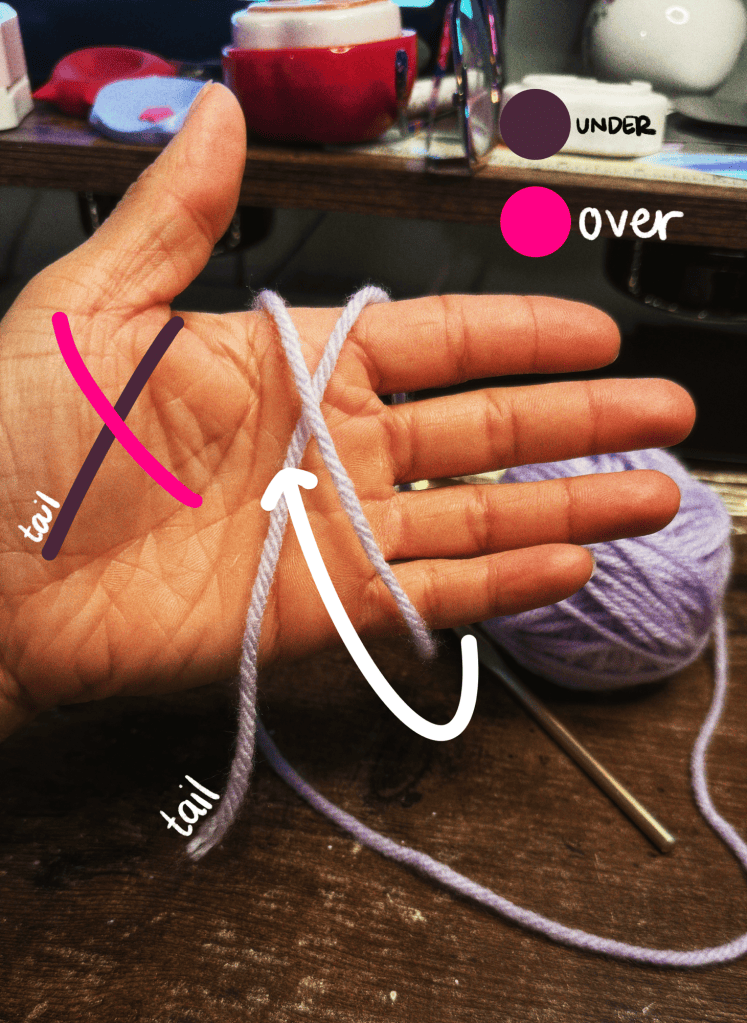
With your thumb pinch the ‘X’.
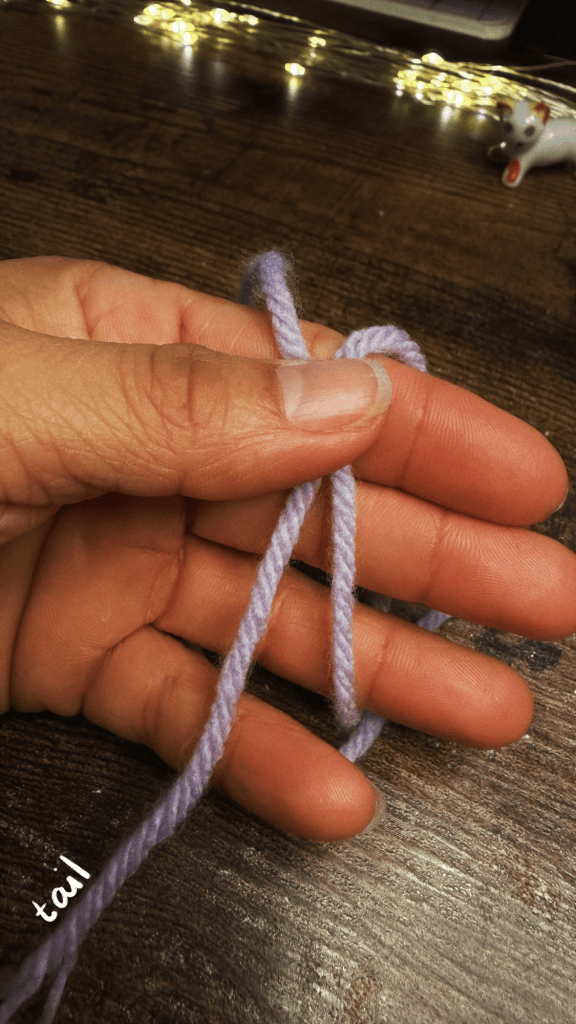
Turn your hand parallel to the floor (or palm facing down); keep pinching the ‘X’.
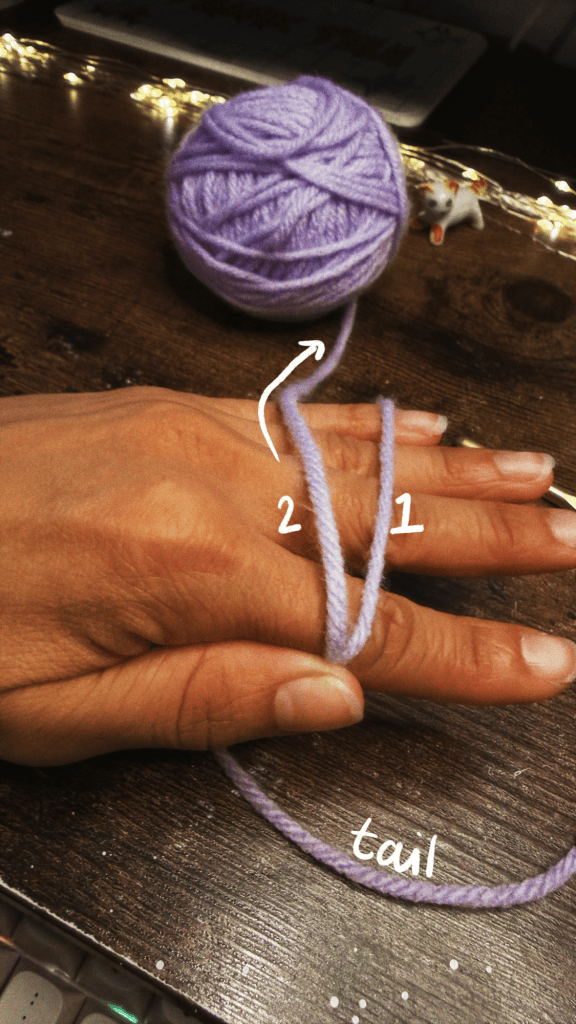
Using your crochet hook. Pull yarn ‘2’ under yarn ‘1’.
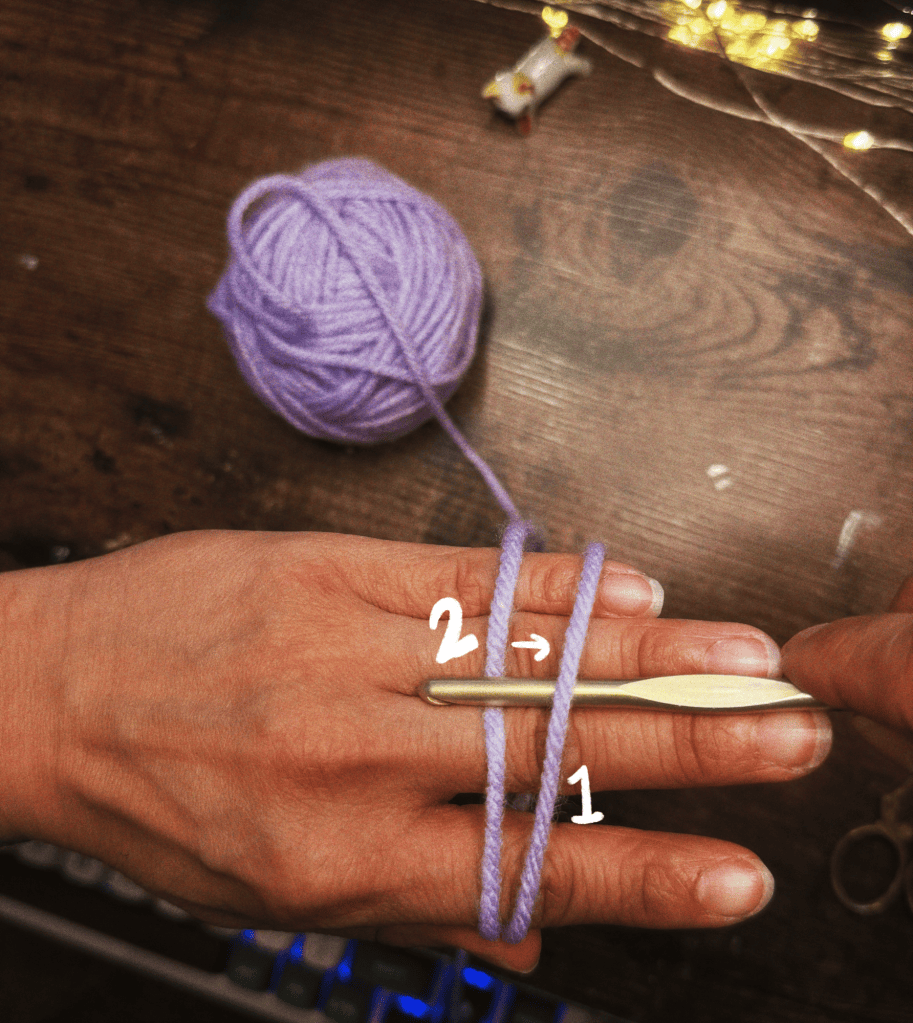
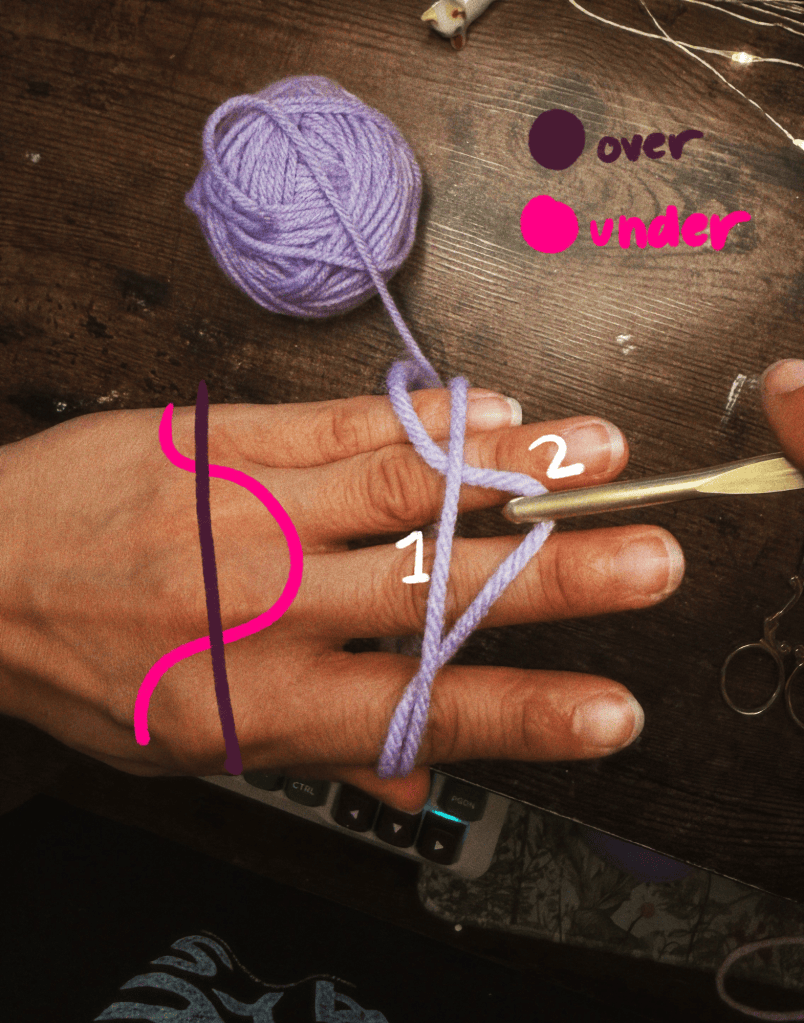
Carefully remove your hand from the yarn.
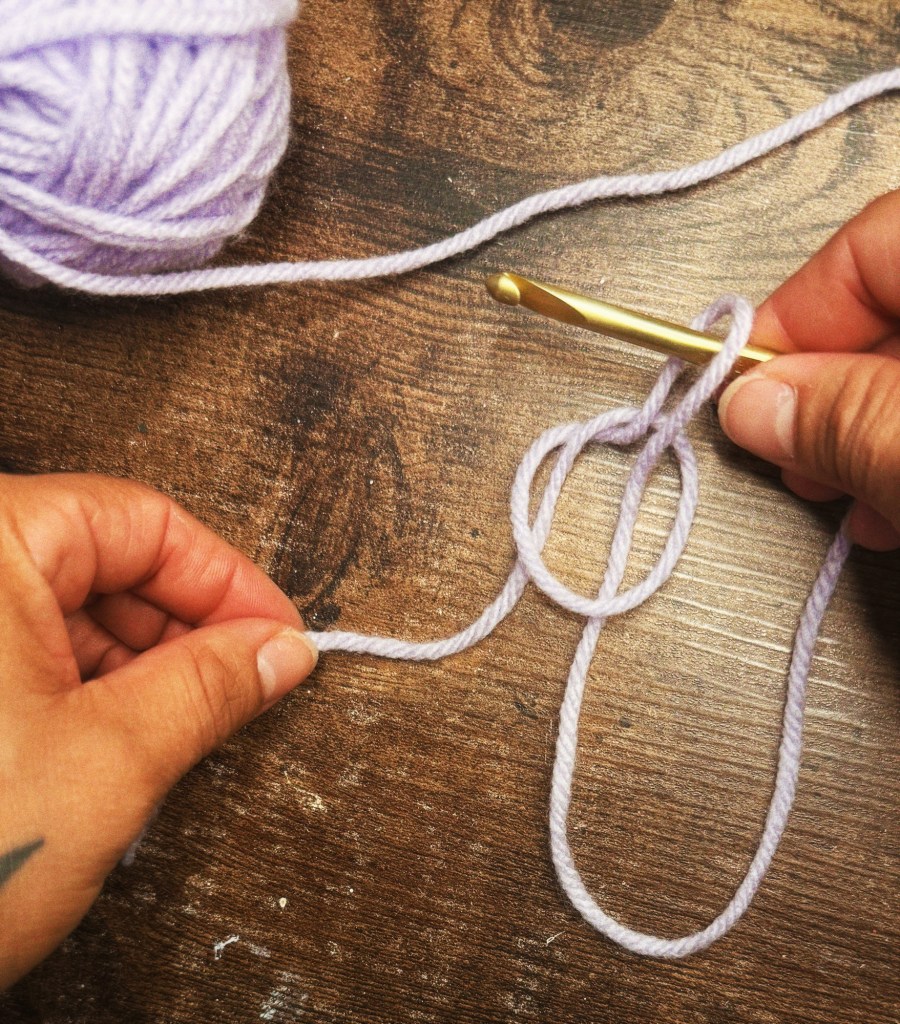
Next, grab the tail (cut end) and the yarn tail (still attached to the yarn ball) and pull. Make sure the loop is still on the crochet hook.
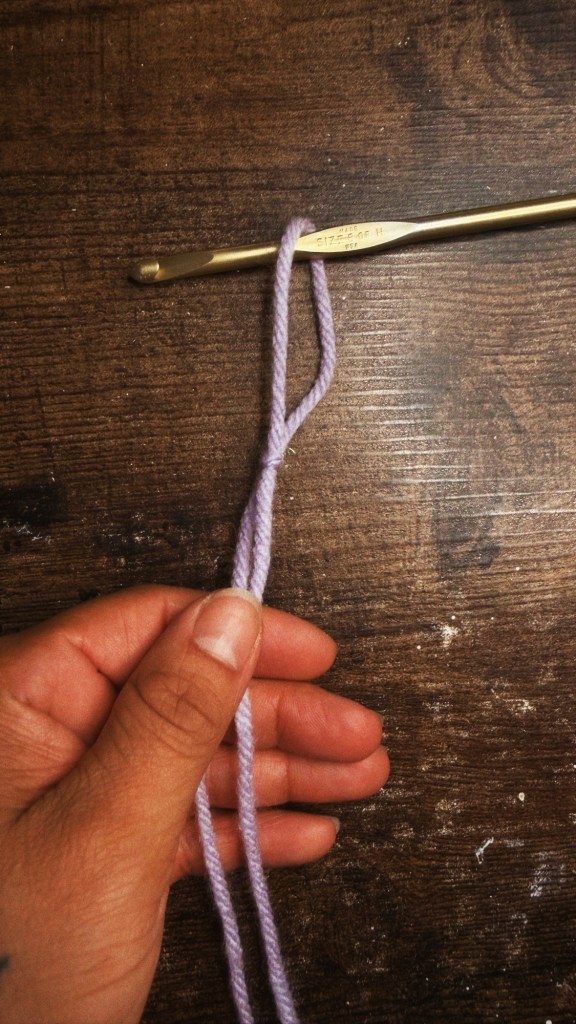
Next, grab the yarn that leads to the yarn ball and pull that string only to tighten the loop around the crochet hook.
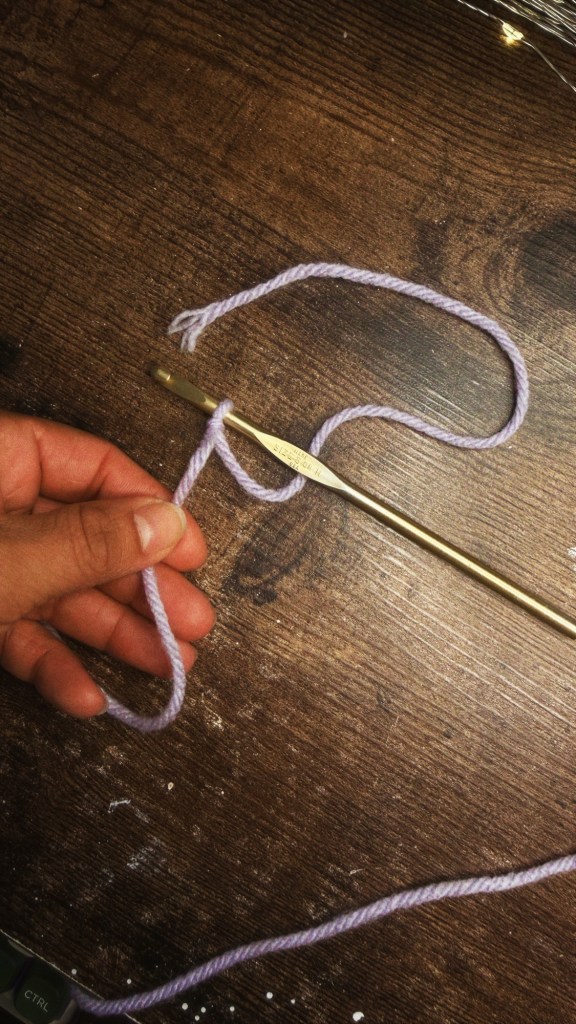
You’ve now created your own slip knot!!! This is how almost all crochet projects start.
I would recommend trying this over and over until you really have it down.
Next we will learn how to chain (ch).
Next we will chain (ch) to create the first row. This is foundation of all your crochet projects that you will create!
Chains are a series of loops that determine the size of your project.
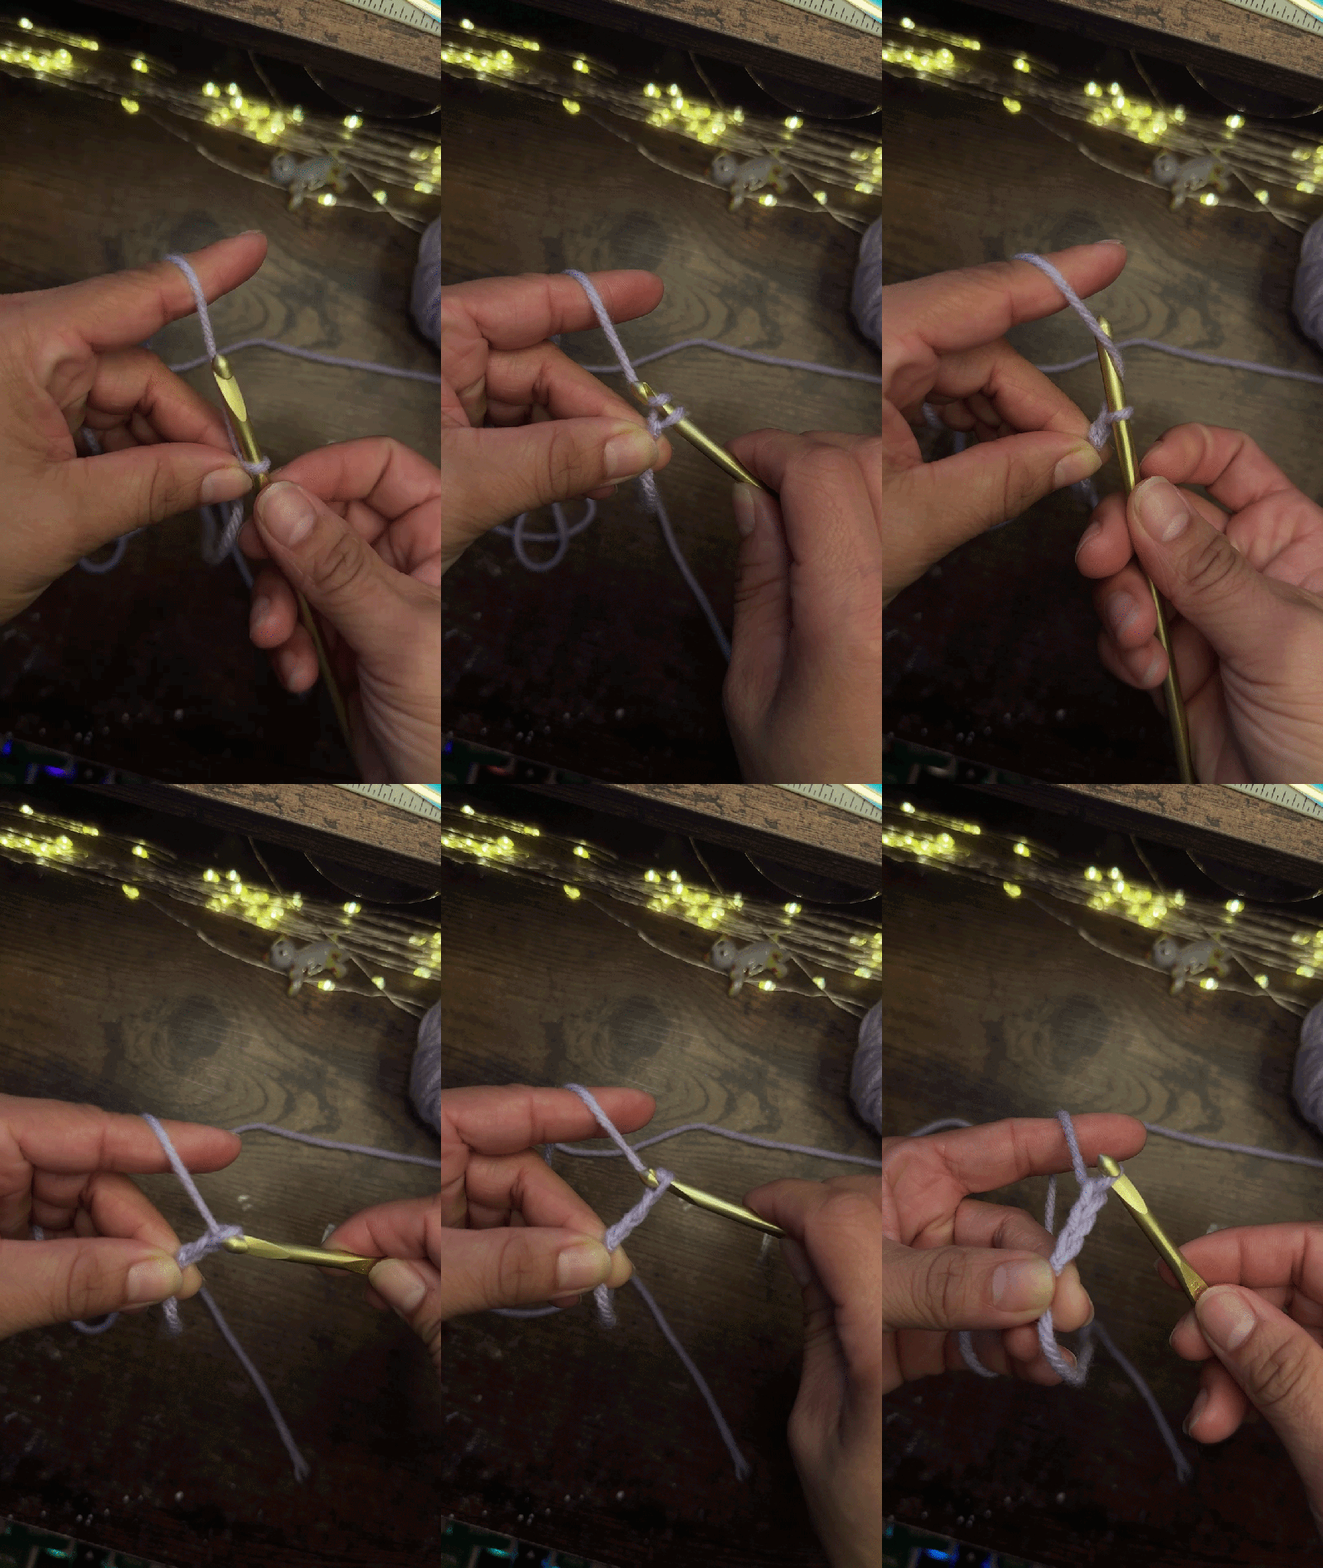
Count your chains (ch) as you go. FYI, your sl st does not count as your first chain. In a crochet pattern it would be written like this:
R0, Ch 20. (Creates 20 chains)
As a beginner, I would count and recount just to make sure I had it right.
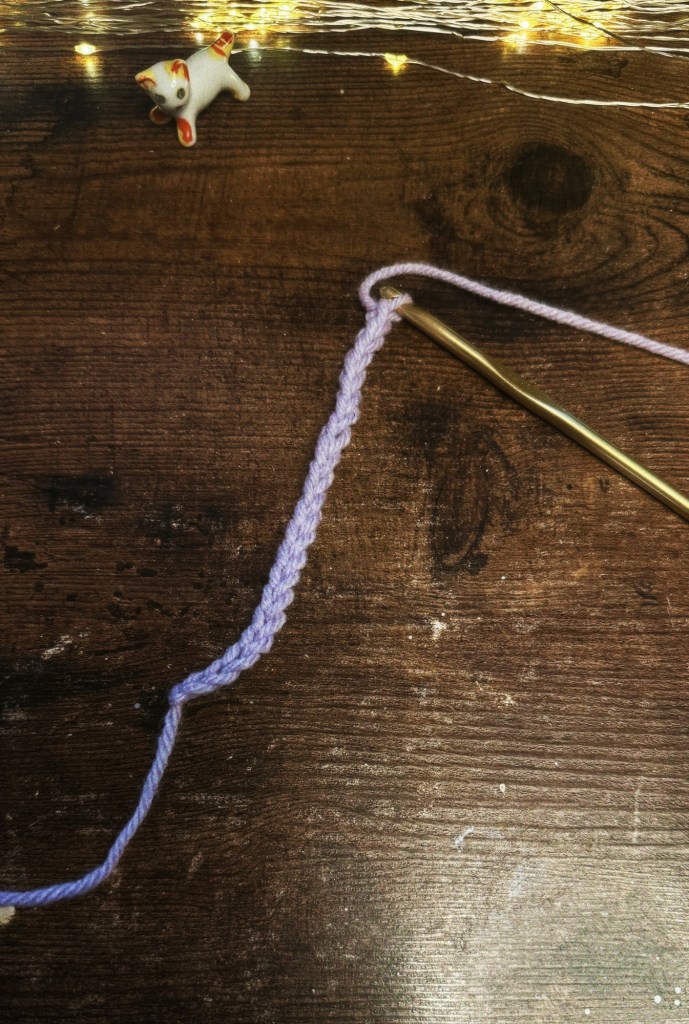
Next you’re going to chain (ch) one more so there is a total of 21.
When you turn your work, this chain (ch) will prevent the sides of your crochet project from getting lopsided. You do this every time your turn your work after each row.
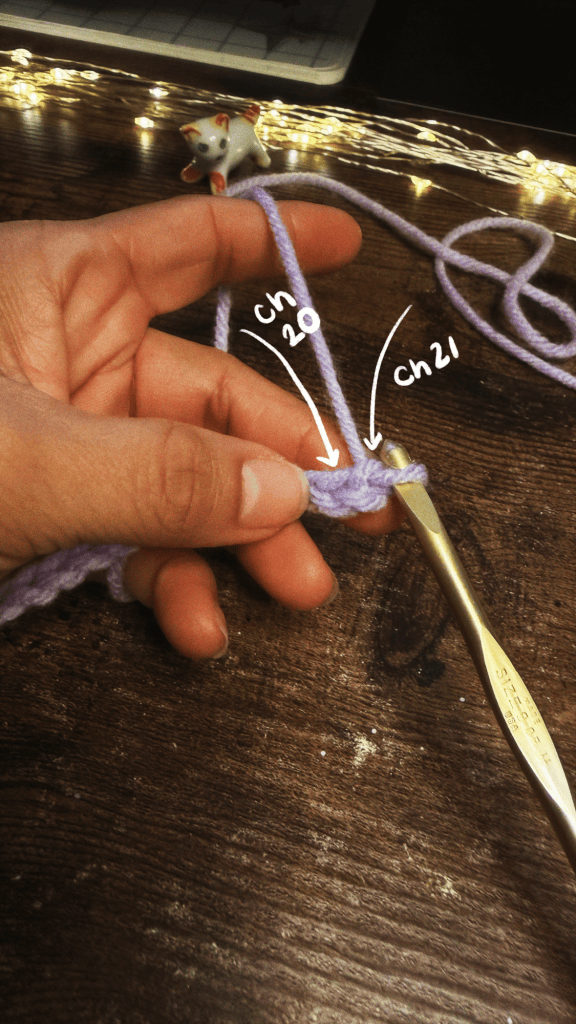
Skip chain 21 that you just made and insert your crochet hook into chain 20.
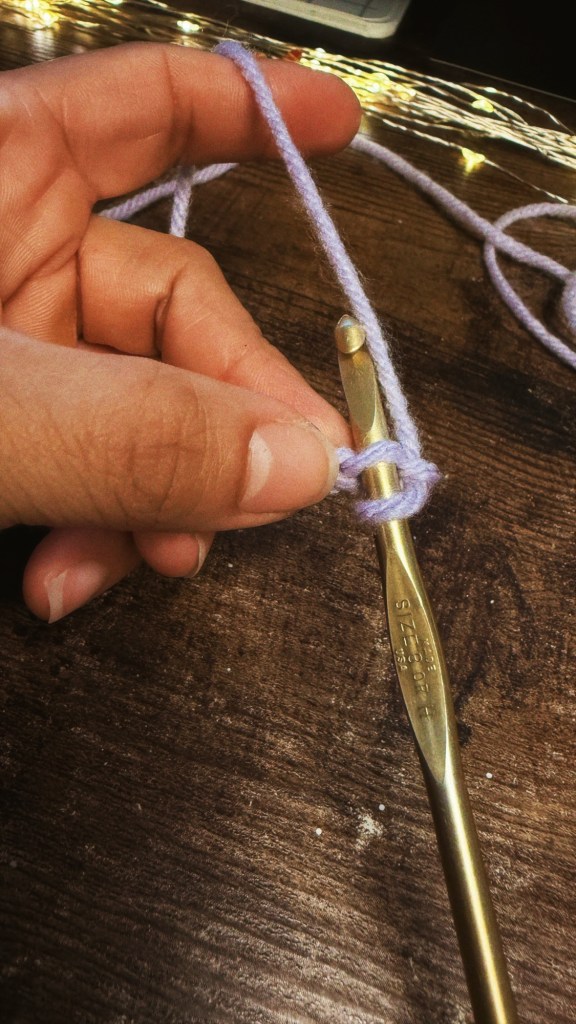
Yarn over, and grab the yarn with the crochet hook.
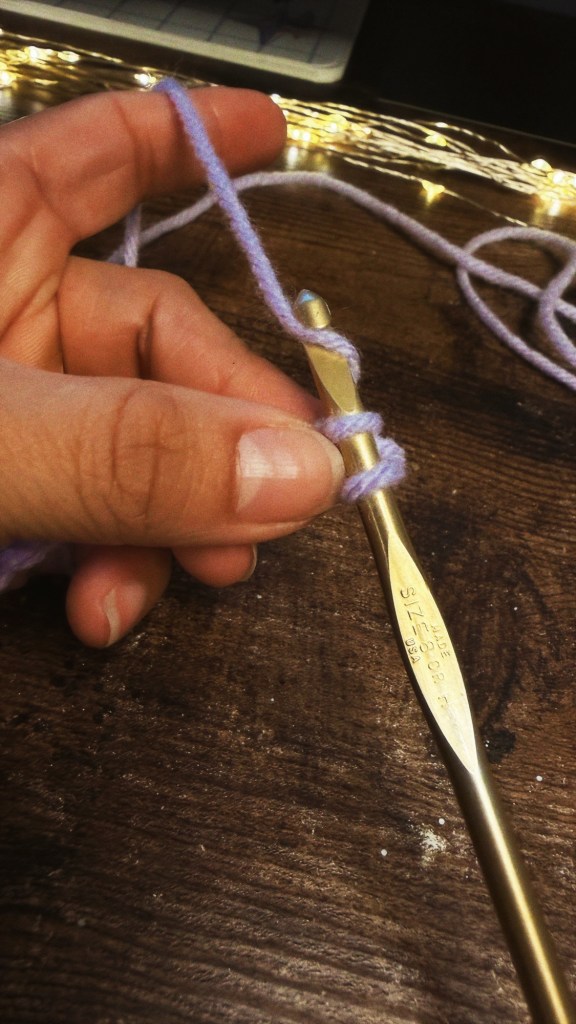
Pull the yarn through the first loop only!
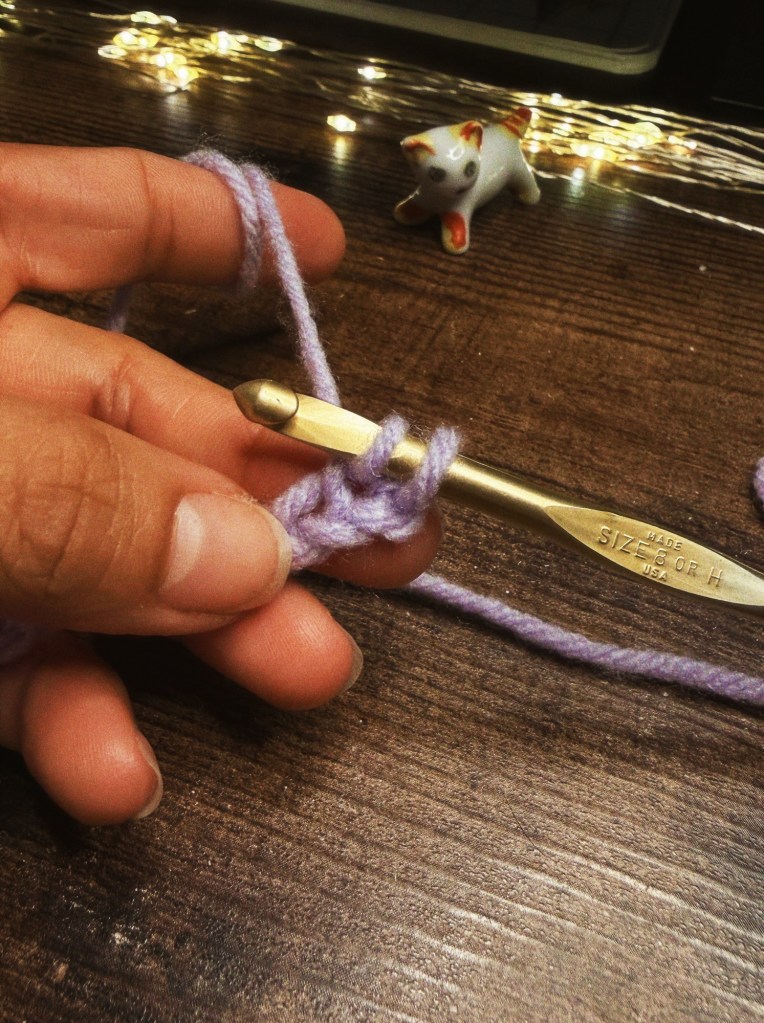
It should look like this. Yarn over again so it looks like three loops on the hook.
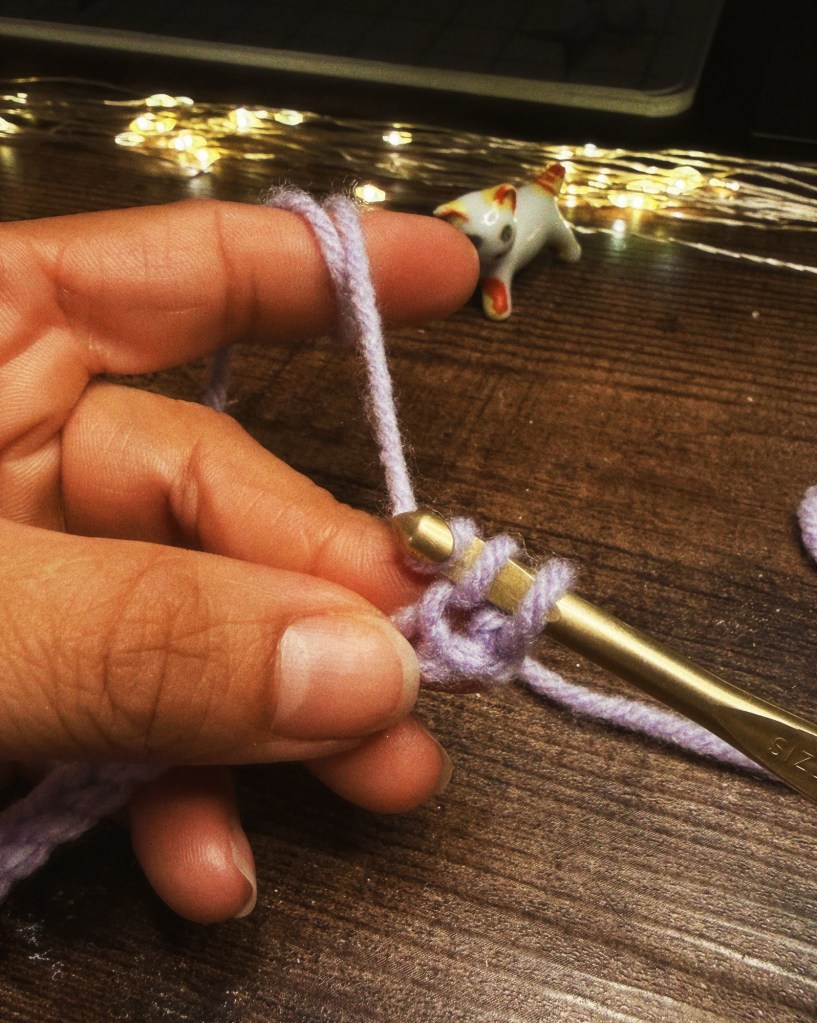
Now, we will pull through both the loops.
Congratulations! 🍾 This is your first single crochet (sc)!
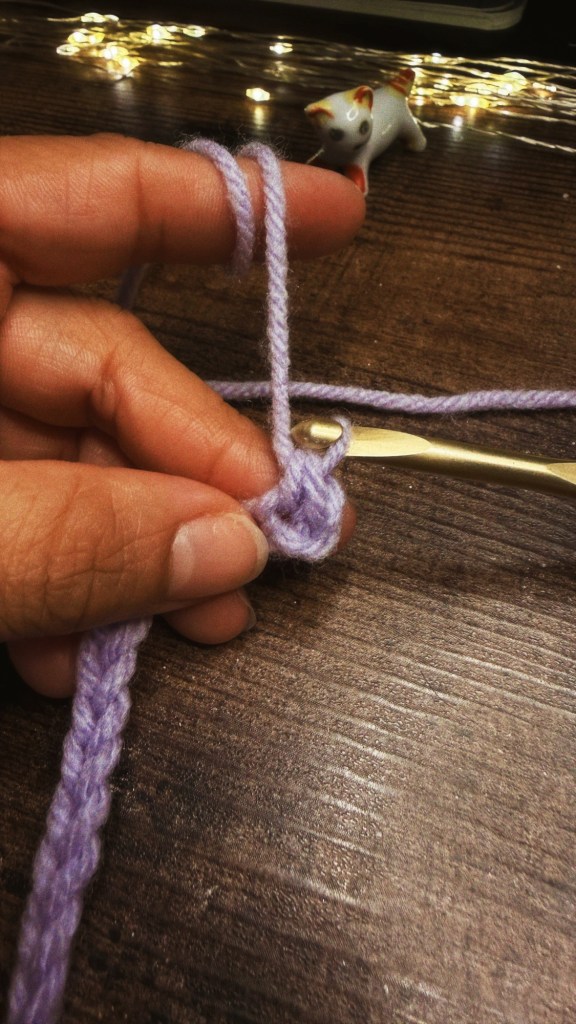
How it should look. Now do it for the rest of the 19 chains. You should end with 20 stitches (st).
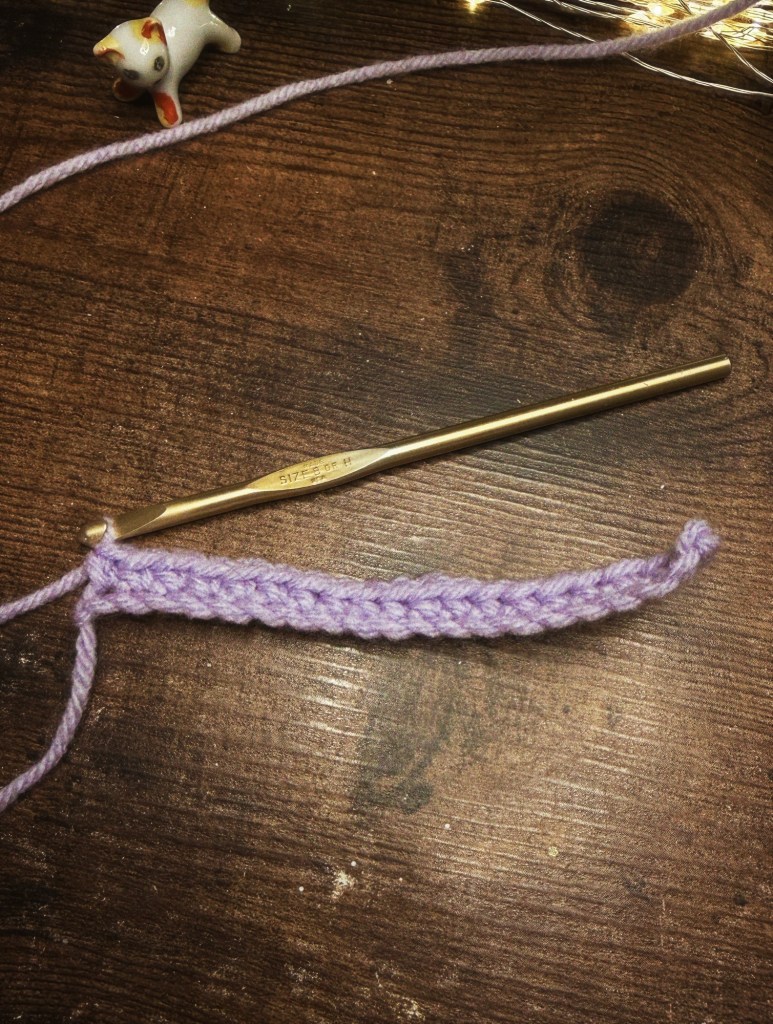
This is your row 1!
Now to make the next row, chain 1 and turn your work again. Then single crochet (sc) into each of the 20 stitches.
Repeat these steps until your desired size.
Here is the pattern in written form using crochet terms.
R0: make a slip knot and ch 21. Turn.
R1: sc into the second ch from your hook. Sc into the next st (20)
R2: ch 1, turn your works sc into the next st (20)
Repeat row 2 until you reach your desired length.
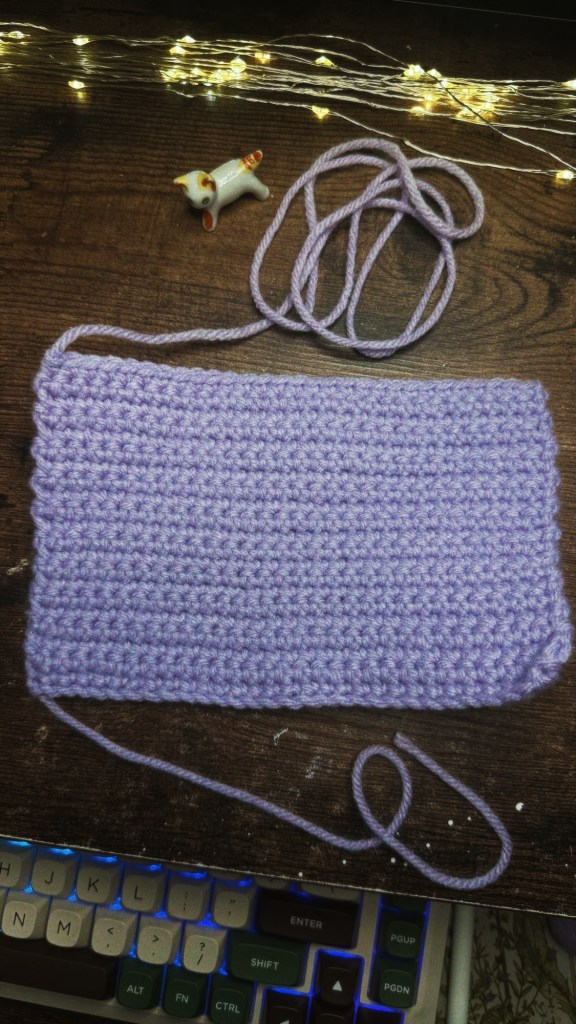
You can adjust the length and width to make a simple washcloth or towel. If you’re super adventurous, you could even crochet a simple blanket.
The edges will naturally fold on you; this is normal in all crochet projects. This is why people will block their work, but I wouldn’t worry about that now.
Happy crocheting! Please let me know if you have any questions. I’d love to see what you create! 🐾🌙
Lets be friends on Instagram!
 Sugar X Spite
Leave a comment